最近项目接触到安防处理,有一个“二步验证”功能。头次听说这个功能。。。网上研究了一下。。。(MFA设备也是它的一种实现)
功能类似普通登录成功后再来一个验证。比如账户和密码输入验证通过后, 再来一个短信或邮件验证码二次确认是本人操作,这样子。
但是短信和邮件有个缺陷,短信依赖运营商并且还收费,和邮件一样,有垃圾拦截策略,有可能收不到。
使用TOTP技术可以解决上面问题,频繁验证使用廉价的TOTP码即可,非必要业务再使用短信或邮件这样。
废话不多说,上码!
工具类 TOTPKit
import javax.crypto.Mac;
import javax.crypto.spec.SecretKeySpec;
import java.net.URLEncoder;
import java.nio.charset.StandardCharsets;
import java.security.SecureRandom;
import java.time.Instant;

/**
 * 二步验证
 */
public class TOTPKit {
    //TOTP 代码的有效时间间隔,以秒为单位
    private static final int TIME_STEP_SECONDS = 30;
    //生成的 TOTP 代码的位数
    private static final int DIGITS = 6;
    private static final String ALGORITHM = "HmacSHA1";

    /**
     * @return 生成一个随机密钥
     */
    public static byte[] generateSecretKey() {
        byte[] secretKey = new byte[20];
        RANDOM.nextBytes(secretKey);
        return secretKey;
    }

    /**
     * @param secretKey 密钥
     * @param code TOTP 验证码
     * @return 验证是否通过
     */
    public static boolean verify(byte[] secretKey, String code) {
        return generateTOTP(secretKey).equals(code);
    }

    /**
     * @param secretKey 密钥
     * @return 生成一个TOTP码
     */
    public static String generateTOTP(byte[] secretKey) {
        try {
            long timeStep = Instant.now().getEpochSecond() / TIME_STEP_SECONDS;
            byte[] data = new byte[8];
            for (int i = 7; i >= 0; i--) {
                data[i] = (byte) (timeStep & 0xff);
                timeStep >>= 8;
            }
            Mac mac = Mac.getInstance(ALGORITHM);
            mac.init(new SecretKeySpec(secretKey, ALGORITHM));
            byte[] hash = mac.doFinal(data);
            int offset = hash[hash.length - 1] & 0xf;
            int binary = ((hash[offset] & 0x7f) << 24) | ((hash[offset + 1] & 0xff) << 16) |
                    ((hash[offset + 2] & 0xff) << 8) | (hash[offset + 3] & 0xff);
            int otp = binary % (int) Math.pow(10, DIGITS);
            return String.format("%0" + DIGITS + "d", otp);
        } catch (Exception e) {
            throw new RuntimeException(e);
        }
    }

    /**
     * @param issuer 颁发 TOTP 令牌的实体或组织的名称
     * @param account 用户账户相关联的名称或标识符
     * @param secretKey 共享的密钥
     * @return 生成TOTP的URI
     */
    public static String toURI(String issuer, String account, byte[] secretKey){
        return "otpauth://totp/" +
                urlEncoder(issuer) + ":" + urlEncoder(account) +
                "?secret=" + toSecretKeyStr(secretKey) +
                "&issuer=" + urlEncoder(issuer) +
                "&algorithm=" + "SHA1" +
                "&digits=" + DIGITS +
                "&period=" + TIME_STEP_SECONDS;
    }

    /**
     * @param secretKey 共享的密钥
     * @return 将密钥转换为字符串
     */
    public static String toSecretKeyStr(byte[] secretKey) {
        StringBuilder encoded = new StringBuilder();
        int buffer = 0;
        int bitsLeft = 0;
        for (byte b : secretKey) {
            buffer = (buffer << 8) | (b & 0xff);
            bitsLeft += 8;
            while (bitsLeft >= GROUP_SIZE) {
                bitsLeft -= GROUP_SIZE;
                encoded.append(BASE32_CHARS[(buffer >> bitsLeft) & 0x1f]);
            }
        }
        if (bitsLeft > 0) {
            encoded.append(BASE32_CHARS[(buffer << (GROUP_SIZE - bitsLeft)) & 0x1f]);
        }
        int paddingLength = (encoded.length() % ENCODED_GROUP_SIZE == 0)? 0
                : ENCODED_GROUP_SIZE - (encoded.length() % ENCODED_GROUP_SIZE);
        return encoded.substring(0, encoded.length() - paddingLength);
    }
    private static String urlEncoder(String value){
        return URLEncoder.encode(value, StandardCharsets.UTF_8);
    }
    private static final SecureRandom RANDOM = new SecureRandom();
    private static final char[] BASE32_CHARS = "ABCDEFGHIJKLMNOPQRSTUVWXYZ234567".toCharArray();
    private static final int GROUP_SIZE = 5;
    private static final int ENCODED_GROUP_SIZE = 8;
}
OK~工具简单 无依赖!
------------------------
下面分享使用 jfinal_demo 做一个演示流程!
下载jfinal_demo不用再说了 https://jfinal.com/download/now?file=jfinal_demo_for_maven-5.0.0.zip
直接上改动部分:
1、为用户方便添加TOTP码,使用二维码扫码添加技术,需要添加二维码依赖:
pom.xml
<!-- zxing 二维码生成 -->
<dependency>
    <groupId>com.google.zxing</groupId>
    <artifactId>javase</artifactId>
    <version>3.4.1</version>
</dependency>
2、模拟登录成功之后,所以需要一个登录用户Account 。加一个账户表,账户密码啥的就不加了,主要模拟登录成功之后
-- 建表 sql
CREATE TABLE `account` (
  `id` int(11) NOT NULL AUTO_INCREMENT,
  `name` varchar(255) DEFAULT NULL,
  `secretKey` varbinary(255) DEFAULT NULL,
  `totp` tinyint(1) DEFAULT NULL,
  PRIMARY KEY (`id`)
) ENGINE=InnoDB AUTO_INCREMENT=3 DEFAULT CHARSET=utf8mb4;
@SuppressWarnings("unused")
public class Account extends BaseAccount<Account> {
    public static Account temp = null;
    public static final Account dao = new Account().dao();

    @Override
    public void setTotp(Boolean totp) {
        super.setTotp(totp);
        this.totpVerify = totp;
    }
    private boolean totpVerify = false;
    public boolean totpVerify(){
        return totpVerify;
    }
}
/**
* Generated by JFinal, do not modify this file.
*/
@SuppressWarnings("serial")
public abstract class BaseAccount<M extends BaseAccount<M>> extends Model<M> implements IBean {
public void setId(java.lang.Integer id) {
set("id", id);
}
public java.lang.Integer getId() {
return getInt("id");
}
public void setName(java.lang.String name) {
set("name", name);
}
public java.lang.String getName() {
return getStr("name");
}
public void setSecretKey(byte[] secretKey) {
set("secretKey", secretKey);
}
public byte[] getSecretKey() {
return get("secretKey");
}
public void setTotp(java.lang.Boolean totp) {
set("totp", totp);
}
public java.lang.Boolean getTotp() {
return getBoolean("totp");
}
}3、TOP拦截器
import com.demo.common.model.Account;
import com.jfinal.aop.Interceptor;
import com.jfinal.aop.Invocation;
import com.jfinal.core.Controller;

/**
 * 登录用户 二步验证
 */
public class TOPInterceptor implements Interceptor {
    @Override
    public void intercept(Invocation inv) {
        Account logonAccount = getLogonAccount(inv.getController());
        if (logonAccount != null && Boolean.TRUE.equals(logonAccount.getTotp()) && !logonAccount.totpVerify()){
            // 登录用户 && 开启验证的 && 未通过验证的,跳转 到 totp 进行二步验证
            inv.getController().redirect("/totpAuth");
            return;
        }
        inv.invoke();
    }

    private static Account getLogonAccount(Controller c) {
        // 虚拟一个登录用户信息 用于测试
        Account logonAccount = Account.temp;
        if (logonAccount == null){
            logonAccount = Account.dao.findById(1);
            if (logonAccount == null){
                logonAccount = new Account();
                logonAccount.setId(1);
                logonAccount.setName("dufuzhong");
                logonAccount.setTotp(false);
                logonAccount.save();
            }
            Account.temp = logonAccount;
        }
        return logonAccount;
    }
}
上述代码中 使用了 Account.temp 这个静态变量 存放 模拟登录成功之后的用户。一般项目都有自己的登录逻辑,存放在缓存中或Session中的。
4、配置拦截器 DemoConfig 中 configInterceptor 加入:
    /**
     * 配置全局拦截器
     */
    public void configInterceptor(Interceptors me) {
       //登录用户 拦截器需要放在前面,这里是模拟示例代码,没放拦截器,自己业务一般是有登录拦截器的
//     me.add(new LogonAccountInterceptor());
       //登录用户 二步验证
       me.add(new TOPInterceptor());
    }
5、测试业务流程的话就在 IndexController 这个类添加 totp方法吧,毕竟方便。。。
import com.demo.common.kit.TOTPKit;
import com.demo.common.model.Account;
import com.jfinal.aop.Clear;
import com.jfinal.core.Controller;
import com.jfinal.core.Path;
import com.jfinal.kit.Ret;
import com.jfinal.kit.StrKit;

/**
 * 本 demo 仅表达最为粗浅的 jfinal 用法,更为有价值的实用的企业级用法
 * 详见: <a href="https://jfinal.com/club">JFinal 俱乐部</a>
 * IndexController
 */
@SuppressWarnings("unused")
@Path(value = "/", viewPath = "/index")
public class IndexController extends Controller {
    public void index() {
       set("logonAccount", Account.temp);
       render("index.html");
    }

//  public void login() {...}
//  public void doLogin() {...}

    /** 开启两步验证 */
    public void totp(){
       //机构或系统名称,方便用户识别是该系统的 验证码
       String issuer = "JFinalDemo";
       Account logonAccount = Account.temp;

       String event = get("event");
       if ("qrcode".equals(event)) {
          // 生成二维码
          String uri = TOTPKit.toURI(issuer, logonAccount.getName(), logonAccount.getSecretKey());
          renderQrCode(uri, 300, 300);
          return;
       }
       set("issuer", issuer);
       set("logonAccount", logonAccount);
       // 刷新密钥
       byte[] secretKey = TOTPKit.generateSecretKey();
       logonAccount.setSecretKey(secretKey);
       // 暂时关闭otp
       logonAccount.setTotp(false);
       logonAccount.update();
       set("secretKey", TOTPKit.toSecretKeyStr(secretKey));
       render("totp_qrcode.html");
    }

    /** totp 验证 */
    @Clear(TOPInterceptor.class)
    public void totpAuth(){
       Account logonAccount = Account.temp;
       // 验证码,可以再增加错误计数,太多错误次数代表是暴力攻击,进行锁定账户多长时间这样的处理
       String code = get("code");
       if (StrKit.notBlank(code)){
          boolean verify = TOTPKit.verify(logonAccount.getSecretKey(), code);
          if (verify){
             // 对登录用户对象 进行 验证成功 标记。用于拦截器判断
             logonAccount.setTotp(true);
             logonAccount.update();
          }
          renderJson(verify ? Ret.ok() : Ret.fail());
          return;
       }
       render("totp_auth.html");
    }

    /** 独立Action 方便权限配置 角色是否可自主关闭验证 */
    public void closeTOTP(){
       // 看业务上是否需要 管理员关闭用户的 二步验证,或者用户重置之类的功能
       Account account = Account.temp;
       //关闭otp验证
       account.setTotp(false);
       account.setSecretKey(null);
       account.update();
       redirect("/");
    }
}
6、添加前端模板代码:
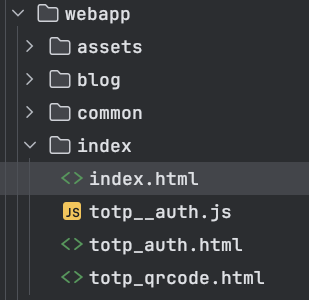
index.html 主页上添加一个 开启/关闭 二步验证
#@layout()
#define main()
<h1>JFinal Demo 项目首页</h1>
<div class="table_box">
    <p>欢迎来到 JFinal极速开发世界!</p>

    <br><br><br>

    本Demo采用 JFinal Template 作为视图文件。
    点击<a href="/blog"><b>此处</b></a>开始试用Demo。

    <br/><br/><hr><br/><br/>
    点击此处
    #if(logonAccount.totp)
       <a href="/closeTOTP"><b>关闭二步验证</b></a>
    #else
       <a href="/totp"><b>开启二步验证</b></a>
    #end


    <br/><br/><br/><br/><br/><br/><br/><br/><br/><br/><br/><br/>
    <br/><br/><br/><br/><br/><br/><br/><br/><br/><br/><br/><br/>
</div>
#end
totp_auth.html
#@layout()
#define main()
    <h1>两步验证</h1>
    <input type="text" id="code" placeholder="请输入 6 位验证码" maxlength="6" minlength="6"/><br><br><br><br>
    <input type="button" id="submit" value="提交"/>
    <script src="/index/totp__auth.js?v=1"></script>
#end
totp_qrcode.html
#@layout()
#define main()
    <h1>两步验证</h1>
    <p>请使用微信小程序搜索 “数盾OTP”,用小程序右下角 “+” 扫描二维码,获取 6 位验证码</p>
    <br>
    <img src="/totp?event=qrcode" alt="二维码"/><br>
    密钥: #(secretKey)<br>
    账户:#(issuer):#(logonAccount.name)<br>
    <hr>
    <input type="text" id="code" placeholder="请输入 6 位验证码" maxlength="6" minlength="6"/><br><br>
    <input type="button" id="submit" value="开启"/>
    <script src="/index/totp__auth.js?v=1"></script>
#end
totp__auth.js
$("#submit").click(function () {
    $.post("/totpAuth", {code: $("#code").val()}, function (ret) {
        if(ret.state == "ok"){
            alert("验证通过");
            window.location.href = "/";
        }else{
            $("#code").val("");
            alert("验证失败");
        }
    });
});
7、启动JFinal吧
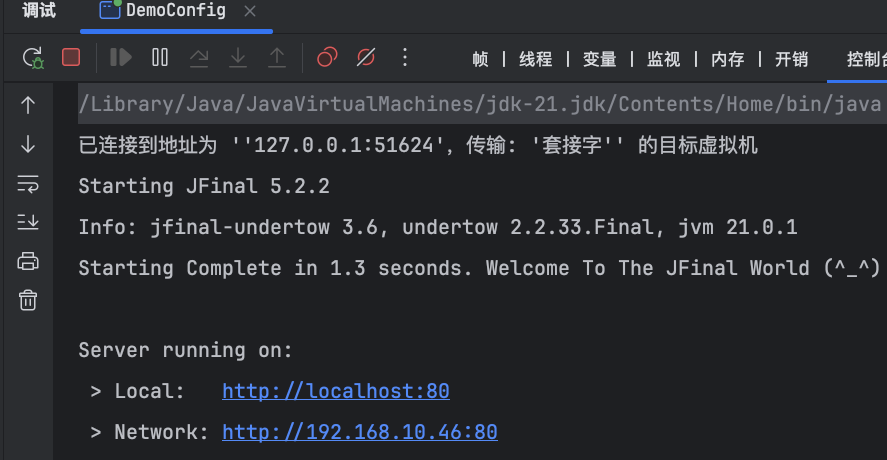
访问:

开启二步验证:

微信搜索小程序:数盾OTP(推荐使用腾讯的)(MFA设备 微信APP可以就是这个设备)
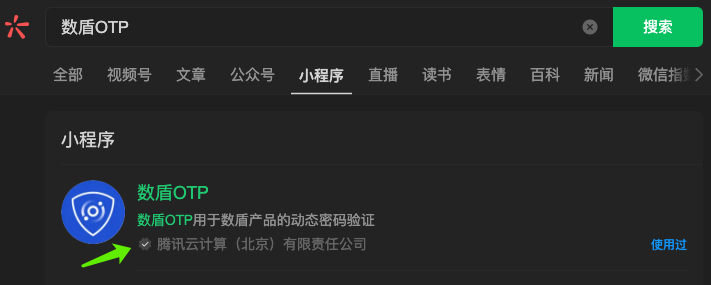
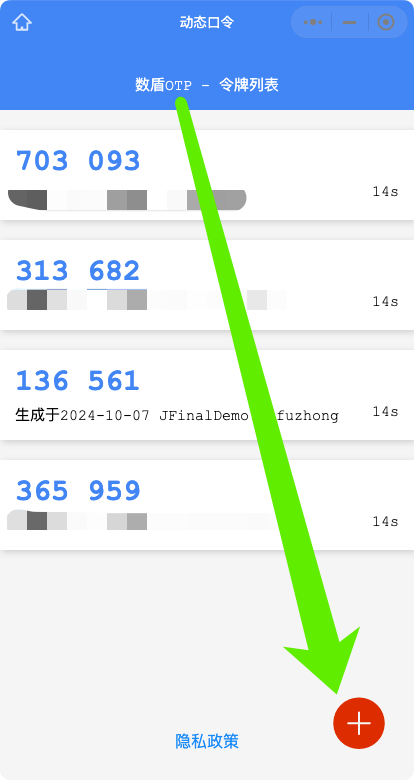
通过 + 扫描二维码 就直接添加到 令牌列表了!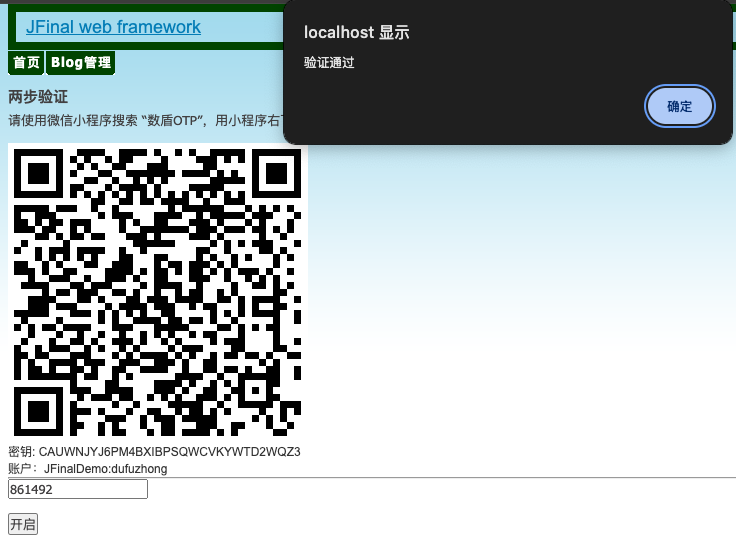
令牌就开通成功了!
看下数据库:
UPDATE `jfinal_demo`.`account` SET `name` = 'dufuzhong',
`secretKey` = 0x6915B319124C427A98600F1BF84C65D1059C9095, `totp` = 1 WHERE `id` = 1;
奈斯~
再重启一下项目,模拟清理了登录账户对象(因为Account.temp 这个是静态变量,重启后就没有, 新Account对象里面验证状态为false 。 private boolean totpVerify = false;)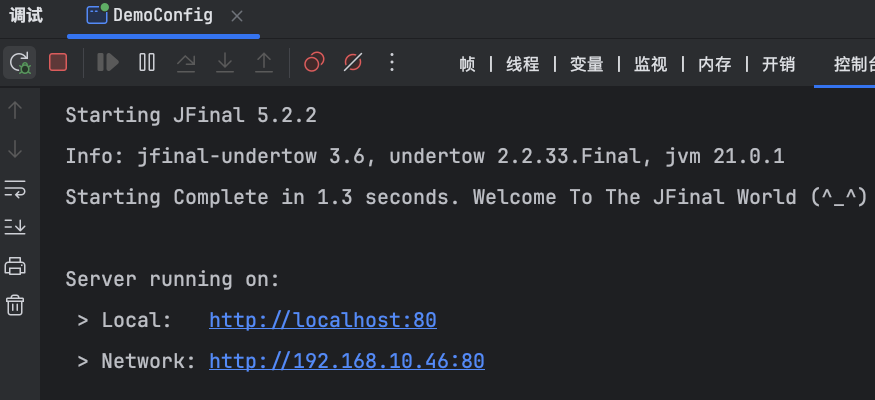
再次访问 会被拦截器 拦截到 输入验证码的界面:

打开微信小程序的 数盾OTP 看看现在 验证码 是多少,输入测试!

再点击关闭验证,并查看数据库:

搞定!
PS:国庆收假了 明天上班咯~


下面这招可以引入 jfinal , 性能比手写的快:
SecureRandom RANDOM = new SecureRandom();
RANDOM.nextBytes(secretKey)